
There’s nothing like the new year to motivate you to tackle some of those house projects on your to-do list! In fact, one recent study shows that spending on home renovations and repairs will jump by nearly 5% in the first quarter of 2022 alone.
If you’re planning your own extreme home makeover, then you’re likely excited about the prospect of a brand-new living space. However, there’s another issue you might not have considered: the mess!
There’s bound to be plenty to pick up when it’s all said and done. Feeling overwhelmed by the idea? Today, we’re sharing a go-to guide that can help you tackle the debris with ease.
1. Clear the Debris
Before you even think about cleaning after home renovations, it’s important to clear the walkway first. Depending on the extent of your project, you might have a good degree of leftover materials crowding your home.
The smart move is to use a home renovation dumpster from the very beginning. There are plenty of reputable resources, like Discount Dumpster Rental, that can provide the right size you need.
This way, all hired contractors will know exactly where to go when it’s time to discard any excess items. You’ll also have it on hand as you complete the clean-up effort. If the materials are still in good shape, then you can consider donating them to a local charity, where they can be used for other housing projects.
2. Start With Surfaces
Once all the major debris is gone, you can begin by thoroughly cleaning all of the major surfaces of your home. Pay close attention to your windows and walls, and sweep or vacuum any visible dirt or dust you can see.
In most cases, a mild solution of gentle dish detergent and water is all you need to get rid of surface-level spots and smudges. Always check in an inconspicuous spot, as some wall coverings will require dry dusting only.
As you work, remember to go over smaller areas that are easy to forget, such as your:
- Easy-Install Crown Molding
- Floorboards
- Doorknobs
- Cabinets (inside and out)
- All hardware
Dry dust or use a damp rag in these spots, and take the time to get into those hard-to-reach corners. Finally, wipe down all of the countertops in your kitchen, laundry room and bathroom using safe and approved cleaners.
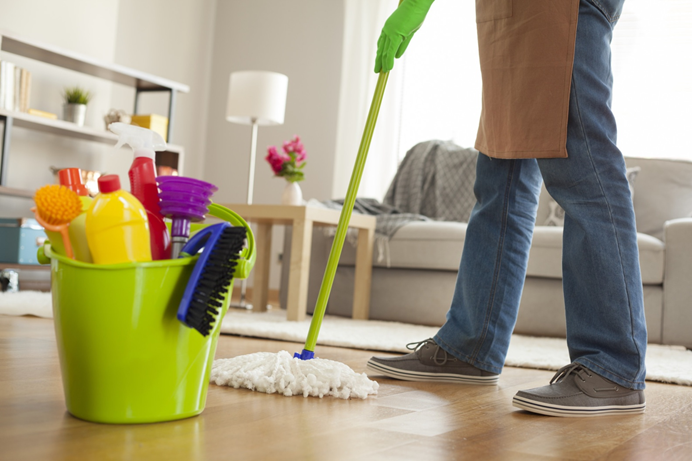
3. Deep Clean Your Floors
Next, move on to your floors. While it’s relatively easy to sweep and mop hardwoods or vinyl, you may need to spend a little more time on any carpeted areas. These can easily trap minuscule particles that aren’t easy to spot. If left untreated, that grime could dim the results of your sparkling home renovations.
Plus, they can also cause allergies and sinus-related symptoms in your family members. Carefully vacuum any rugs or carpets, or consider hiring a professional steam cleaner to do the work for you.
Sometimes, you’ll still notice a little residual dust hanging around after you’ve gone over your floors once. If that’s the case, then a second round with the vacuum might be in order.
4. Clean Your Upholstery
No, you can’t exactly throw that armchair in the washing machine, even if you want to! The same goes for your living room sofa or the upholstered headboard in your bedroom.
However, if you’ve been knocking out walls, refinishing floors, or sanding and painting around your home, then you’ve likely stirred up plenty of dust. Where do those particles go? Right into your furniture.
If you’ve never used it before, now is the time to break out that special upholstery attachment that came with your vacuum years ago. This accessory uses special mechanisms to effectively remove dirt and debris from your cherished, cozy furnishings.
5. Change Your Air Vents
When you’re in the middle of an extensive renovation cleanup, you might focus primarily on the objects and surfaces you can see. However, it’s also important to consider what might be lurking inside of your home.
Throughout your project, newly generated dust entered the air in your home, and mingled with it. Then, it moved into the air vents.
If you don’t clean those vents out and replace your filters, then that contaminated air could continue to re-circulate throughout your home, which can lead to respiratory issues. Thankfully, it’s relatively easy to complete this task.
Once you’ve removed the vent covers from your walls and ceilings, simply clean those spots out with a little soap and warm water. When they’ve had time to dry, replace all of your exposed air filters with new ones and you’re done!
6. Sanitize High-Touch Areas
Cleaning after renovation is key. However, don’t forget to also sanitize certain spots! This especially applies to high-touch areas, such as your bathroom or kitchen.
Here, you can use antibacterial cleaners on your toilet, shower, and sinks. Be sure to also sanitize all doorknobs or handles, and go over appliances with speciality cleaners that won’t damage or change their finish.
Other smaller areas that can be hot-beds for germs include:
- Light switches
- Outlets
- Electronics
- Small appliances
- Decor items
It might take a little more time, but it’s important to clean these items, too!
7. Wipe Down Your Windows
As you walk around your home, take a clean, damp cloth with you and wipe down all of your windowsills and window frames, sticking to the interior only. These may look dusty or dirty due to the air in your home.
If you have blinds, shades, or plantation shutters, then use a cloth and vacuum to remove all surface-level dust. If the shades are made of fabric, then you may be able to wash them in the washing machine. Otherwise, take them to your local dry cleaner to make sure they’re free of dust and allergens.
Optimize Your Extreme Home Makeover
A major renovation should be thrilling! If you’re even more stressed afterward, then the ensuing mess could be to blame. Now that you know how to clean up after an extreme home makeover, you can create a simple checklist to get the job done.
If it seems like too much for you to handle on your own, then consider hiring a professional clean-up crew to take care of the work for you. It might just be the best investment you make to date!
Looking for more trusted lifestyle advice? Check back often for informative buying guides, helpful lists, and more!