
More home projects require concrete than you think! If you’re working on DIY home projects and realize you need to pour concrete, it can cause you to stop in your tracks. Not everyone knows how pouring concrete works, and that’s okay.
Figuring out how to pour concrete is easier than you think! These concrete pouring tips are here to act as your guide throughout the entire process. Before you know it, you’ll be an expert!
1. Safety First!
Safety is always the number one priority with any concrete pouring guide. Depending on where you’re pouring, you may need to contact a government building and obtain a permit. We also recommend contacting a safety department so you know where pipes and wires are if you need to do any digging.
Wearing long pants, work boots, a long-sleeved shirt, gloves, and safety glasses should be worn throughout the entire process. These tools protect your skin from chemical burns caused by wet concrete on the skin.
2. Know Where You’re Pouring
The next step is to know where you’re pouring. You can use stakes or markers to get the general shape of the area. Avoid using flags as markers because they can get confused with flags marking wires, pipes, and gas lines in the ground.
Adjust the markers to match the space perfectly and take measurements. These measurements can be used to determine the volume of area you need to cover.
3. Get Ready to Pour
Preparing your site for the pour is one of the most important steps on this list. If you need to remove a post from the pour site, you should use a post puller to avoid creating a giant hole in the ground. A post puller is a quick and easy way to clear posts out of a pour site.
When pouring for a driveway, patio, or slab, dig 4 to 8 inches into the ground. This is a good opportunity to make sure the ground is level using a 48-72 inch long leveler. Remove oddities like sticks, twigs, and anything else that could create an uneven surface.
Next, use a hand tamper to flatten the ground. An even, flat surface can lead to a solid concrete surface.
4. Create a Frame
Creating a frame gives concrete support during the drying process. Wood is a common framework used to pour concrete. But, you can also use plastic in cases where circles or other organic forms are needed.
When the frame is in place, use your leveler to make sure the height is the same throughout the entire frame. Reinforce any joints, check the level again, and your frame is complete.
5. Forming Good Base
Dirt can change size with the weather, so creating a gravel subbase guarantees that the concrete will have a solid surface all year. This should be a 4-8inch base spread evenly over the surface.
Finer stones will be more compact and stable than open grade stones. But, more open stones are cheaper and help water drain.
You will need to tamper the ground again so it stays even. If you want more support, a wire mesh should be placed over the gravel.
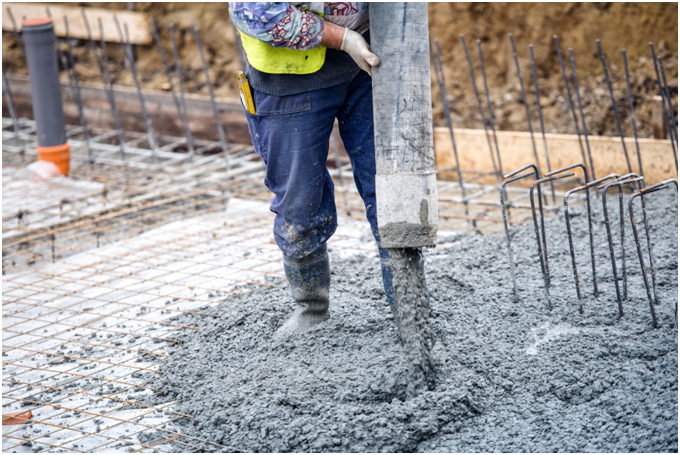
6. Have Fun Mixing and Pouring!
If you haven’t been wearing your safety gear, now is the time to put them on! Depending on the amount you need mixed, you can use a bucket, shovel, and muscle instead of renting a mixer. But if you have a lot of area to cover, renting a concrete mixer is a great investment.
Each bag will have mixing instructions, and it’s recommended to avoid hard water. Hard water will cause discoloration and increase how fast concrete hardens. This makes it harder to make a solid concrete block.
Pour concrete into the frame and scrape out as much as you can. Fill the concrete to the top of the frame to make the final steps after pouring easier.
Have a hose or bucket of water available to clean materials. When all the concrete is out of the bucket or wheelbarrow, rinse it off with a hose so the concrete doesn’t solidify in your wheelbarrow.
7. Finishing the Concrete
Using a long wooden plank or a screed board, quickly smooth the concrete before it starts to harden. Use a back and forth motion to go from one side of the concrete to the other. Continue doing this until the surface is smooth.
If you want a more professional finish, use a wood and magnesium float to smooth the concrete after using the screed board. Place the wood on top of the concrete and push it away from your body. Elevate the far side of the float as you do this.
When you bring the float back, elevate the side facing you to prevent drag marks. Then, use the magnesium float in a semicircular motion for a final finish.
The last step is to cure and seal the concrete. It can take 28 days for concrete to solidify. Adding a seal after the concrete is poured and smoothed will protect against cracks and discoloration.
Knowing How to Pour Concrete is Easy!
Now that you know how to pour concrete, nothing is stopping you from redoing your driveway, fixing a post, or creating a patio. This is a fun process that can be a great DIY activity.
If you’re looking for more concrete pouring advice or tips about home renovations, check out the rest of our blog!