
Did you know that the cost of home repair and renovations has doubled since the pandemic?
What’s more, not only does it cost 50% more, but it also takes 50% longer to finish! Thus, it’s no wonder many people are now resorting to DIY home repairs such as drywall repairs.
Are you here looking for a step-by-step guide on how to repair drywall? Then, you’re in the right place! Keep reading to find out how you can repair your drywall today!
Assess the Damage and Get Your Tools and Materials Ready
Before running to the hardware store, assess the damage you’re trying to fix. This will give you an idea of the tools you’ll need to resolve your drywall problems.
Do you have a few small nail holes? Then you’ll only need some joint compound or mud, a small putty knife, and a sanding block.
Any holes bigger than a nail hole will require more than the bare necessities. You’ll have to buy mesh drywall tapes, drywall screws, and the likes.
During drywall repair, you should wear protective clothing such as work gloves and a dust mask. It’s also important that you know the placement of utilities like electrical wirings in your home. For your safety, make sure to locate them first before you begin drilling or cutting drywall.
How to Repair Drywall: Small and Medium Holes
The drywall repair process for small holes starts with cleaning the hole with a knife. Clear out rugged edges and cut an angle so that the exterior of the hole is bigger than the interior. Doing so will help create a smooth surface.
Next, fill the hole with drywall compound, ensuring it has the same level as the wall surface. After it dries, lightly sand the area until you get that smooth surface.
For medium holes, you can opt to use drywall metal patches. Sand the surface of the hole and wipe off the dust. Make sure that the hole is at the center of the metal patch before you firmly press the metal patch in place.
Spread compound or mud over the metal patch. Similarly, smooth out the wall once the drywall compound dries. You can repeat this process until you can no longer detect the patch.
How to Repair Large Drywall Holes
Larger drywall holes need patches made of the drywall itself. First, draft and cut a square around the hole you’re patching. Make sure that you cut a perfect square, making patching drywall easier.
We made it easier to get a piece of drywall that could fit in the hole by cutting the hole out into a square. Note that the tighter the drywall fits in the hole, the better the results.
Move on to your drywall sheet and cut out the same measurement. However, before placing your new drywall patch, add a wood furring as back support.
Simply screwing your new drywall to the studs can leave a crack on your drywall mud, or the patch itself will not survive long. This is because drywalls are weak materials. As such, it’s smart to screw a scrap piece of wood at the center of your cutout.
A good rule of thumb is to screw a solid wood surface to every 6 inches of your new drywall lengthwise. Thus, if you cut a square 12 inches long, you should place two wood furry as back support.
At this point, you can now place your drywall patch in the hole. You may need to trim it out a little to get it to fit the hole perfectly. Next, secure the patch by screwing the perimeter and center studs of your drywall patch.
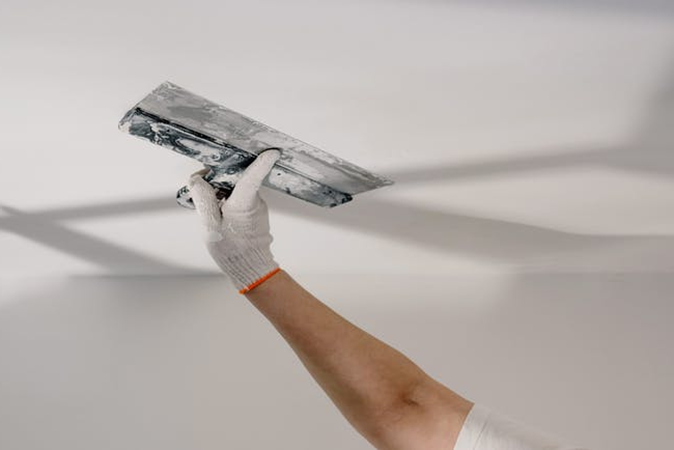
Tape and Mud
To finish off the drywall repair, get a self-adhering mesh tape and cover the gaps along the patch’s edges. Make sure to fill all the voids with drywall compound evenly before letting it dry. Once it dries, sand the drywall compound until you get a smooth surface.
If you’re not satisfied, you’re free to apply another layer of compound. You can repeat the process two to three times until you get what you’re looking for. Finish off by painting it over with the same color as the rest of your wall.
Remember that voids like screw holes suck in drywall mud which leaves a second hole for you to fill after sanding the first coat. Thus, make sure to dab an extra compound or mud over the top of the screws when you apply the first coat. Also, don’t fret too much if your drywall repair has waves or scratch marks, as another coat of mud can fix this.
Repairing Drywall with Plaster
If you’re looking for another answer to how to repair drywall, then plaster repair might be what you need. Plaster Repair is a lot easier compared to patching drywall sections or applying joint compounds. It’s also economical for filling larger drywall holes.
First, purchase and prepare the Plaster of Paris in disposable plastic or bucket. Then, add a few spoons at a time until you get a toothpaste consistency. Note that plaster of Paris dries very quickly, so it’s best to mix in small batches.
To repair a hole larger than 6 inches, you need to fill the hole with backing material like a newspaper. Then, trowel the plaster mixture into the hole and over your chosen filling material.
Let it dry for about 10 minutes before applying another layer. Make sure to mix the last coat of plaster a bit looser.
Repeat until the patch is even with the wall surface. Prime then paint the surface wall afterward.
If you’re dealing with a crack on your drywall, plaster repair is also a viable option. The repair process starts with scoring and cutting the crack deep into the drywall. Make sure it forms a groove to create a bonding surface for the plaster.
You can then apply the mixed plaster to the crack with a drywall taping knife. In small sections, mix and fill as needed starting from top to bottom. As always, finish off by sanding and painting on the repaired surface.
Repair Your Drywall With the Best Methods!
Found this article helpful? We’ve got more fun reads to share aside from this amazing article on how to repair drywall. So visit our website and check out our latest posts for more money-saving tips and tricks!