
As a musician or music producer, your studio space is not just a room – it’s an extension of your creative mind and an integral part of the sound you seek. Creating music is an art that requires an environment free from the distractions of the outside world. For top-notch music production, using quality soundproofing solutions offers the dual benefit of keeping your music in and unwanted noise out.
If you’re planning to make the most out of soundproofing, here’s how you can transform your studio into a sound sanctuary.
Step 1: Identify the Sources of Noise
To effectively soundproof your room, begin by identifying the culprits that may disturb your recording and mixing sessions. These sources can be external, such as street traffic, neighbours, natural elements, or internal, including mechanical noises from HVAC systems, computer fans, or even the vibrations from your instruments. Here’s a plan of action:
- Make a list of potential external noise sources and their levels during different times of the day.
- Observe the internal sources – run a ‘silent’ test by closing all windows and doors to distinguish the internal sources of noise.
- Use a sound level meter app or device to quantify and compare noise levels from different sources.
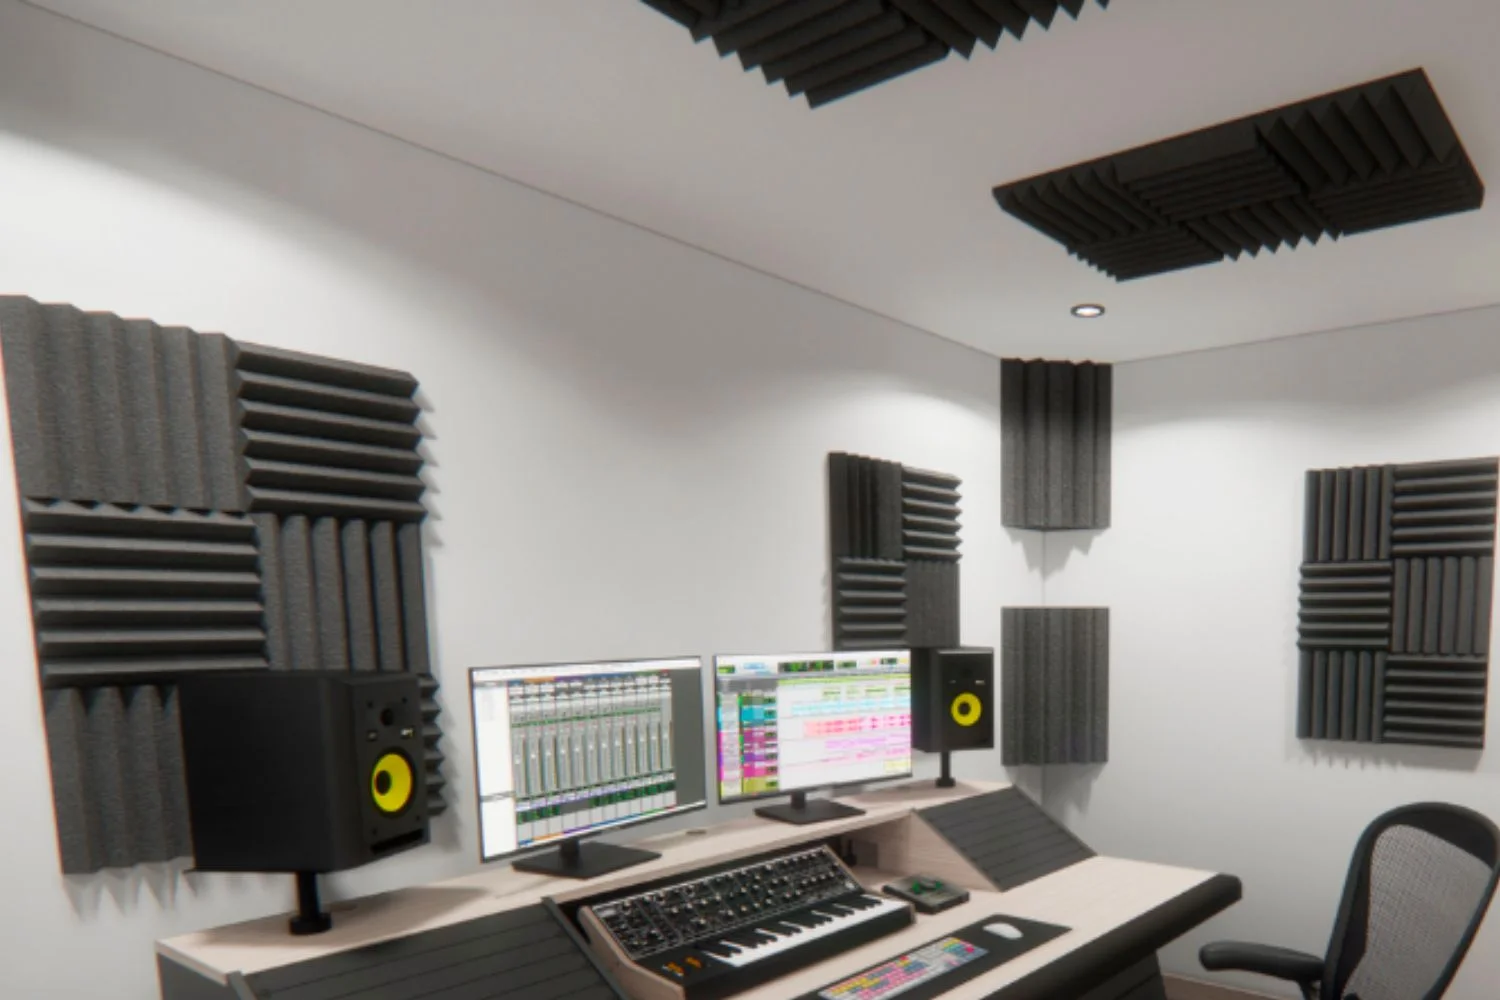
Step 2: Choose the Right Soundproofing Materials
Soundproofing is more than just hanging egg cartons on the walls (a common misconception). Modern music studios use sophisticated materials to absorb and block sound effectively. Here are the main options:
- Acoustic Panels: It’s a room soundproofing material designed to absorb sound reflections within the room. Acoustic panels, often found in various thicknesses and designs, are suitable for controlling internal acoustics.
- Acoustic Foam: Similar to panels but more lightweight, foam can be used to dampen high frequencies and improve clarity.
- Resilient Channels: These specially designed metal channels help break the path of sound waves, reducing ‘flanking’ noise that can leak through ceilings and walls.
When selecting soundproofing materials, consider their Noise Reduction Coefficient (NRC) for absorption and Sound Transmission Class (STC) rating for blocking sound. Also, remember that different parts of the room may require different materials or a combination of them for optimal results.
Step 3: Install Soundproofing Panels
Proper installation of soundproofing elements is crucial to their efficacy. Follow these general guidelines:
- Preparation: Ensure the walls are clean and dry, and if necessary, paint the wall with a primer with good adhesion properties for the soundproofing panels to stick well.
- Mounting Brackets: For ceiling and wall panels, use mounting brackets to create an air gap behind the panel, enhancing sound absorption.
- Panel Placement: Identify ‘live’ areas in the room (where sound reflects off the walls) and ‘dead’ areas (where the sound is more muted). Place panels strategically to balance these acoustic elements.
- Spacing: While you don’t want to overload the room with panels, spread them out enough to create an even acoustic environment.
- Professional Insight: For more complex soundproofing or if you’re dealing with a particularly sensitive acoustic project, consulting a professional can be invaluable.
Step 4: Seal Gaps and Cracks
Soundproofing is more about blocking sound than preventing it from escaping or entering through various openings. To create an airtight space:
- Sealant: Use a high-quality acoustic sealant to fill in any gaps or seams between soundproof panels and walls and around doors and windows. This will prevent sound from ‘leaking.’
- Green Glue: This specialised soundproofing compound is applied between layers of drywall to create a viscoelastic layer that dissipates sound energy, reducing vibration transfer.
Make sure to pay close attention to corners, as neglecting these areas can significantly undermine the effectiveness of the soundproofing.
Step 5: Test the Soundproofing Effectiveness
Even the most meticulously planned room soundproofing job can benefit from a thorough testing process. Here’s how to test the effectiveness of your soundproofing:
- Conduct a simple sound test: Play music or generate controlled noise from within your studio, and observe if any sound escapes.
- Use professional services: Audio engineers can conduct more complex tests using professional-grade equipment to measure sound reflection, absorption, and transmission.
Regularly revisit your setup and make adjustments as necessary. Sometimes, minor modifications to the placement of panels or additional sealing can significantly affect sound performance.
Common Mistakes and Pitfalls
Understanding the common missteps can help you avoid them and ensure a successful soundproofing project. Some pitfalls to watch out for include:
- Underestimating Space Requirements: Proper soundproofing often requires a significant amount of space. Be prepared to lose some room volume to the soundproofing process.
- Neglecting Regular Checks: Over time, soundproofing can degrade, or you may notice new sources of noise requiring additional measures. Make sure to monitor the soundproofing regularly.
- Skimping on Quality: Investing in good quality materials and workmanship will provide a better return in terms of improved acoustics and longevity.
Conclusion
Maximising the benefits of room soundproofing for music production is a multi-faceted task that requires care, planning, and the right resources. Follow these steps to create an environment that protects and enhances your music. Remember, your studio is the canvas on which your sonic art is painted, and superior soundproofing is one of the tools that can turn your artistic vision into a reality. Embrace the process, and the music will speak – or not, depending on your skill in crafting the perfect soundproof environment.